If you are building a NAS, a quick google search will most likely land you on FreeNAS (Core/Scale), Unraid, OpenMediaVault (OMV), CasaOS, etc.
I’ve tried FreeNAS Scale and OMV and very quickly I realised those aren’t great options for my needs. Let’s see what I ruled out and why:
- FreeNAS is designed to only be a NAS appliance. It gets in a way of admining the server, and I didn’t like that.
- OMV spat out errors whatever I did on the UI, the amount of troubleshooting I had to do was just not worth it.
- UNRAID is a paid option, and I didn’t want to pay for something I can get for free. Besides this, running OS from a USB stick seemed like a bad idea to me.
- CasaOS seemed to be a great option. Basically it’s not an OS in classic sense, it’s just an app that provides a UI for management, but is a new player in the market, and I didn’t want to be a guinea pig. I also don’t really need a UI, I’d much prefer to have everything automated via
ansibleand for other things I can justSSHinto the server. - Proxmox is another option that I considered, but running a hypervisor and VMs would require beefier hardware. Had I had a server with more RAM and CPU cores, I’d definitely go with Proxmox.
Even before considering all these options I felt like I wanted to have a setup what I’m familiar with. I used to administer CentOS servers at work, I also had some of those running in EC2. So my first thought was to run old good CentOS. And I would if I didn’t find ansible-nas project, which requires Ubuntu Server
NixOS. Which seemed a lot of fun and has out-of-the-box support for zfs. One day, I’ll certainly lay my hands on it, but at the moment when I needed to get my stuff done I didn’t have time to learn the new waysMay 2025 UPDATE: This day has come! My old MacBook is rocking NixOS now.
ansible-nas
I got sold on ansible-nas the moment I’ve read the very first paragraph of the README:
After getting burned by broken FreeNAS updates one too many times, I figured I could do a much better job myself using just a stock Ubuntu install, some clever Ansible config and a bunch of Docker containers.
(c) Dave Stephens - creator of
ansible-nas
Also read Why I Ditched FreeNAS And Replaced It With Ubuntu Server And Ansible by David if you are still convinced you need NAS-only OS.
It seemed like the right solution to me, so I quickly flushed Ubuntu 22.04.3 LTS onto my machine, forked the repo and started modifying it to my needs. Over time I’ve added some more apps like wireguard, immich, mysql, and valkey and working on some others like tubearchivist and tailscale.
Overall the whole setup is very easy to maintain. The official documentation is very detailed and easy to follow. Basically, to enable an app all you need is to see what variables are available in the roles/<app>/defaults/main.yml file, and override them in the inventories/<your-inventory>/group_vars/nas.yml file.
The very first thing I was obliged to do is to give my server a name. Since I have a very poor imagination I called my workhorse… a workhorse:
ansible_nas_hostname: workhorseI also created a Makefile with some useful commands like these:
all: ansible-playbook nas.yml
deps: ansible-galaxy install -r requirements.yml
check: ansible-playbook --check --diff nas.yml
samba.check: ansible-playbook --check --diff --tags "samba" nas.yml
samba: ansible-playbook --tags "samba" nas.yml
immich.check: ansible-playbook --check --diff --tags "immich" nas.yml
immich: ansible-playbook --tags "immich" nas.yml
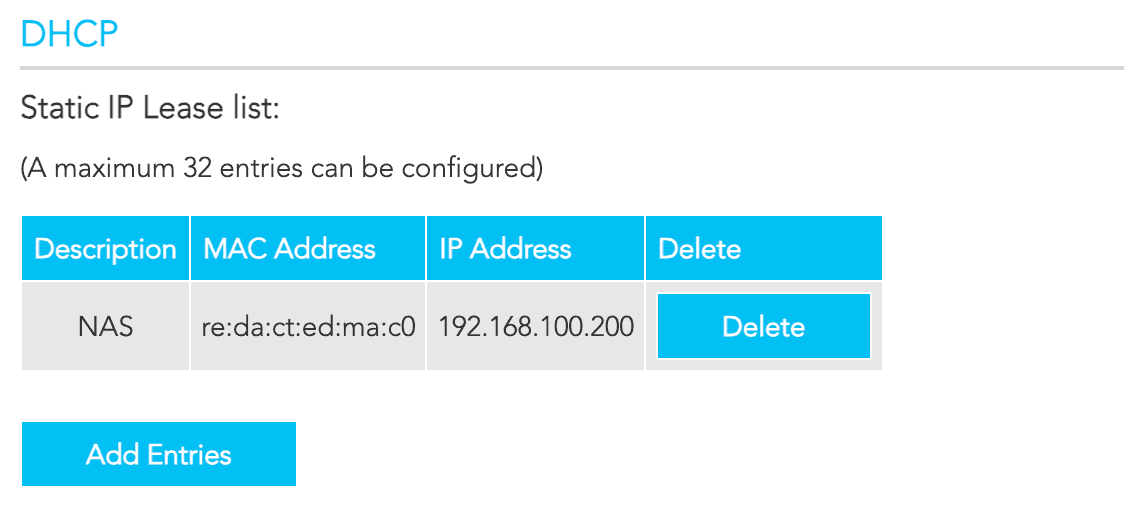
# etcAnd I gave my server a static IP address (by making DHCP server on my router to always assign the same IP to the MAC address of my server):
Finally, I’ve created a zfs pool and called it rust:
zpool create rust mirror \    /dev/disk/by-id/wwn-0x5000c500db125622 \    /dev/disk/by-id/wwn-0x5000c500db13fa95
zpool status  pool: rust state: ONLINE  scan: scrub repaired 0B in 04:10:47 with 0 errors on Sun Oct 30 04:34:48 2024config:
        NAME                        STATE     READ WRITE CKSUM        rust                        ONLINE       0     0     0          mirror-0                  ONLINE       0     0     0            wwn-0x5000c500db125622  ONLINE       0     0     0            wwn-0x5000c500db13fa95  ONLINE       0     0     0
errors: No known data errors
But more on zfs in the next post.
Samba
Samba (SMB) is open-source software that enables file and printer sharing across Linux, macOS, and Windows by implementing the SMB/CIFS network protocol for easy cross-platform access.
Among other samba shares I’ve got one for the file exchange. I treat it similar to Downloads directory. Once it’s mounted on the client machine and I need to transfer a file, but I don’t yet know what would be the best place for it, I just drop it there. Later I can opt to move it to a more appropriate place:
samba_shares: - name: exchange comment: "File exchange" guest_ok: yes read_only: no public: yes writable: yes browseable: yes path: "{{ rust_root }}/exchange"Mounting on MacOS
To mount the share on MacOS I use the following command:
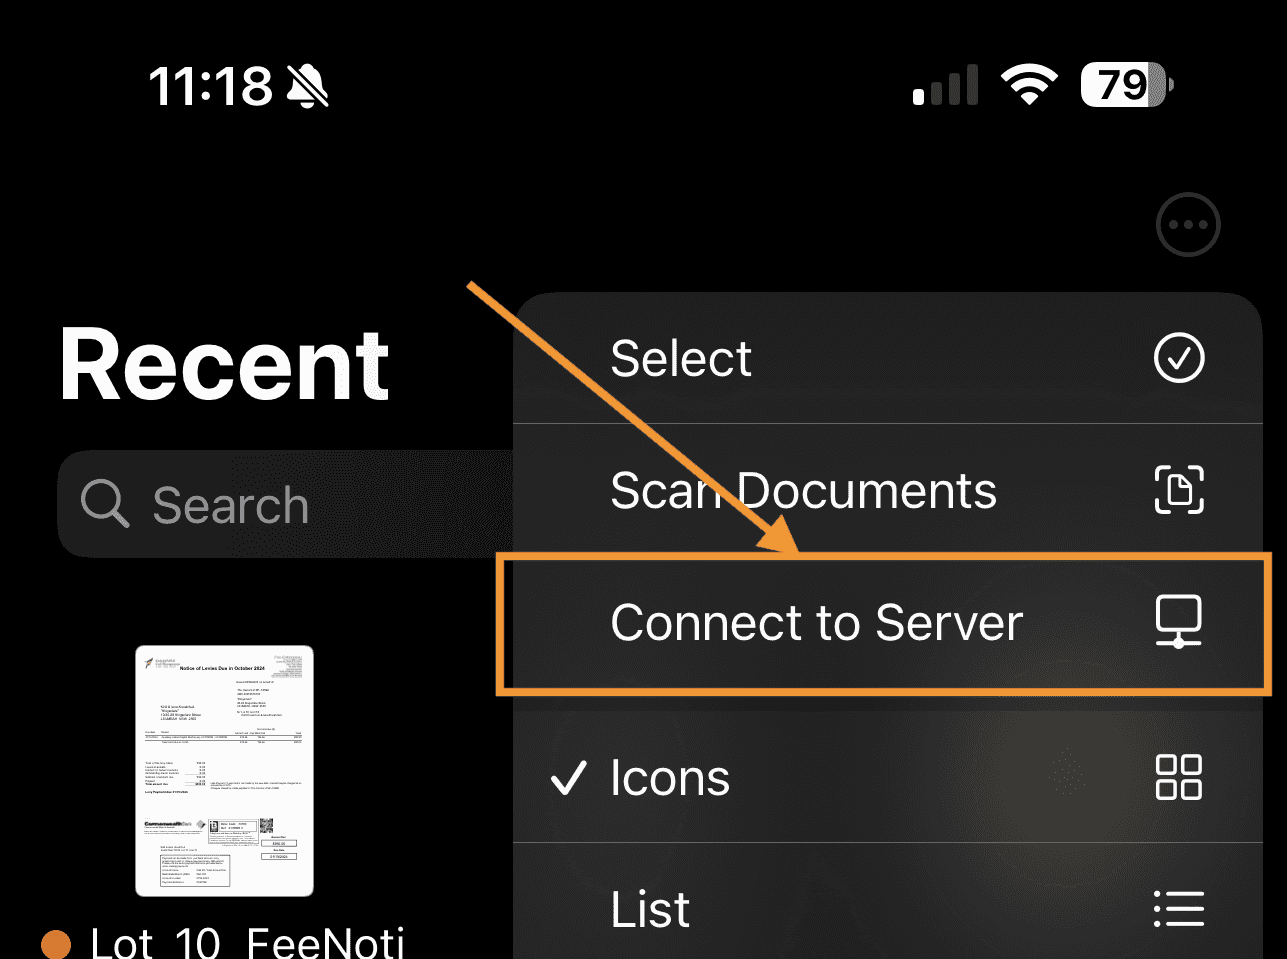
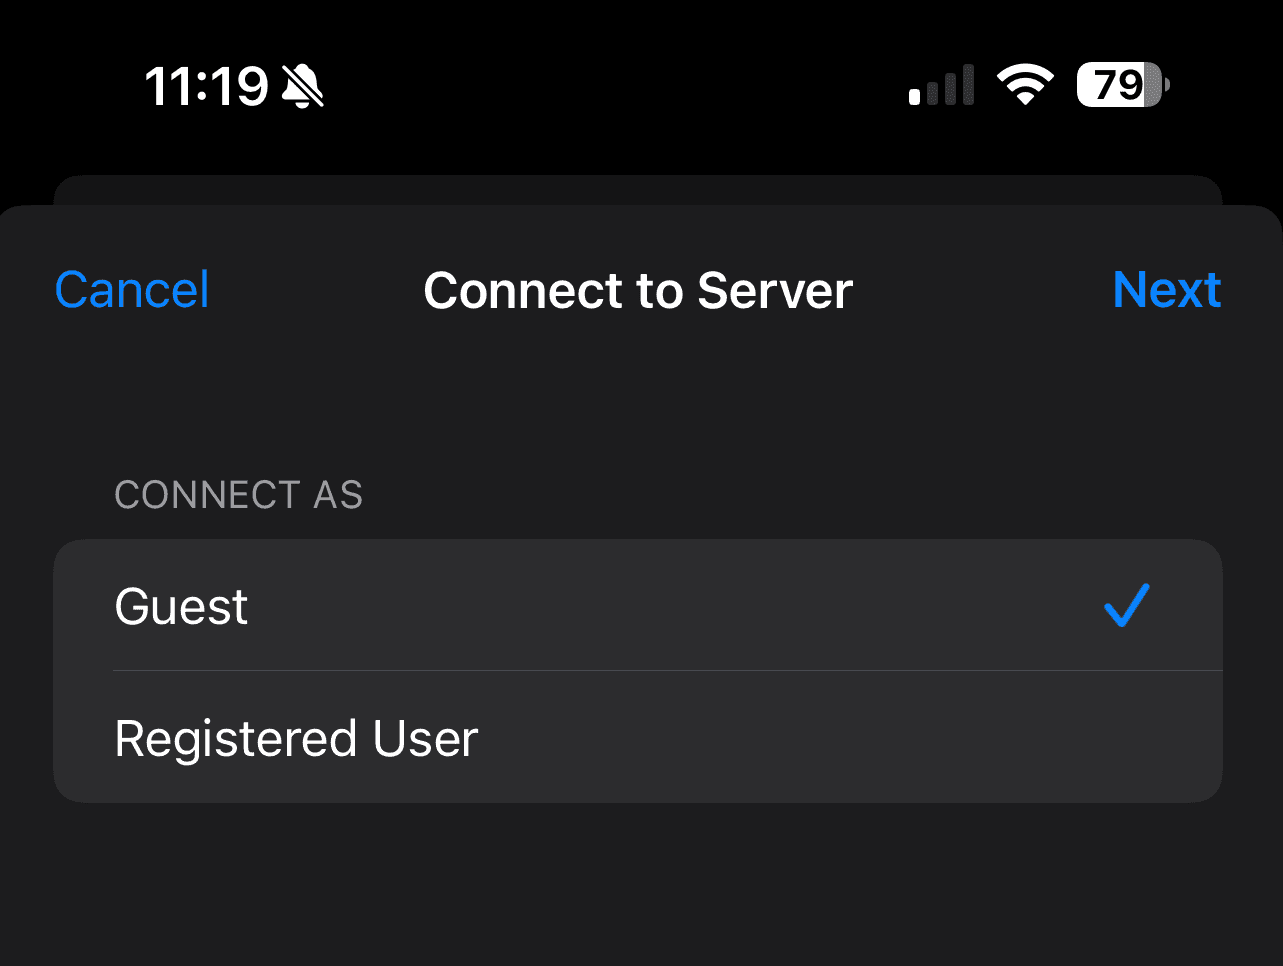
mount_smbfs //guest@workhorse/exchange /Volumes/workhorse/exchangeMounting on iOS
Just use Files app. Click on ... -> Connect to Server and type in smb://<ip address>, select to connect either as a guest or with a username and password, and voila!
Nice domain name
By default, when you install an application using ansible-nas you can configure the port it’s available on (or leave it default), but memorizing what app runs on what port is a bit of a mental gymnastics I’d rather not engage in on a daily basis. So I decided to use traefik as a reverse proxy and give each app a subdomain. I also wanted my app run over HTTPS, so I’ve configured traefik to use letsencrypt to provision SSL certificates automagically. For all these to happen I need a domain name, and I need my DNS provider to pass the letsencrypt challenge. I’ve registered an easy to remember 3-character domain in the .me tld using namecheap and delegated DNS management to Netlify mainly because to get namecheap API, according to their policy, I’d need to either have 20 domains registered with them, or have at least $50 on my account, or have at least $50 spent within the last 2 years, and I didn’t meet any of these criteria. Netlify, on the other hand, provides API free of any conditions.
Registering a domain name and setting up DNS
Just register a domain name and head to DNS management settings. Just make sure the DNS management provider is listed on the traefik dns challenge providers list. Than add an A record pointing to your server’s IP address:

nas.home, I redacted it for security reasons even though for now my DNS records point to my local IP which isn’t available from “outside”Let’s Encrypt Challenge and Traefik
The Let’s Encrypt challenge is a process to verify domain ownership before issuing an SSL certificate. Typically, it uses HTTP-01 or DNS-01 challenges, where the server either hosts a specific file at a URL or adds a DNS record, proving control over the domain.
Traefik automates the whole process. The only bit is traefik needs a way to talk to the DNS provider to add a challenge record and a little bit of configuration of the traefik itself - it needs to know what ACME (Automatic Certificate Management Environment) provider to use for automatic SSL provisioning (which is Let's Encrypt in our case). This part of the configuration comes with the ansible-nas project, and only needs to be modified if you wish to use a different ACME provider.
For traefik to be able to talk to Netlify API I created an API key and specified it in the traefik configuration in the inventories/workhorse/group_vars/nas.yml file:
traefik_enabled: true# find the relevant name and environment variables for your DNS provider at https://go-acme.github.io/lego/dns/traefik_dns_provider: netlifytraefik_environment_variables: NETLIFY_TOKEN: "nfp_th1sIsnotMyR3alN3tl1fyAPIt0kEn"To enable individual app custom domain name all that is required to do is to add a few lines in the inventories/<your inventory>/group_vars/nas.yml file like:
wallabag_enabled: truewallabag_available_externally: truewallabag_hostname: "save"the <app-name>_hostname is optional, ansible-nas provides some sane defaults. Like if I want to access wallabag on save.nas.home, I do need to specify wallabag_hostname, if I don’t, the app will be available on wallabag.nas.home.
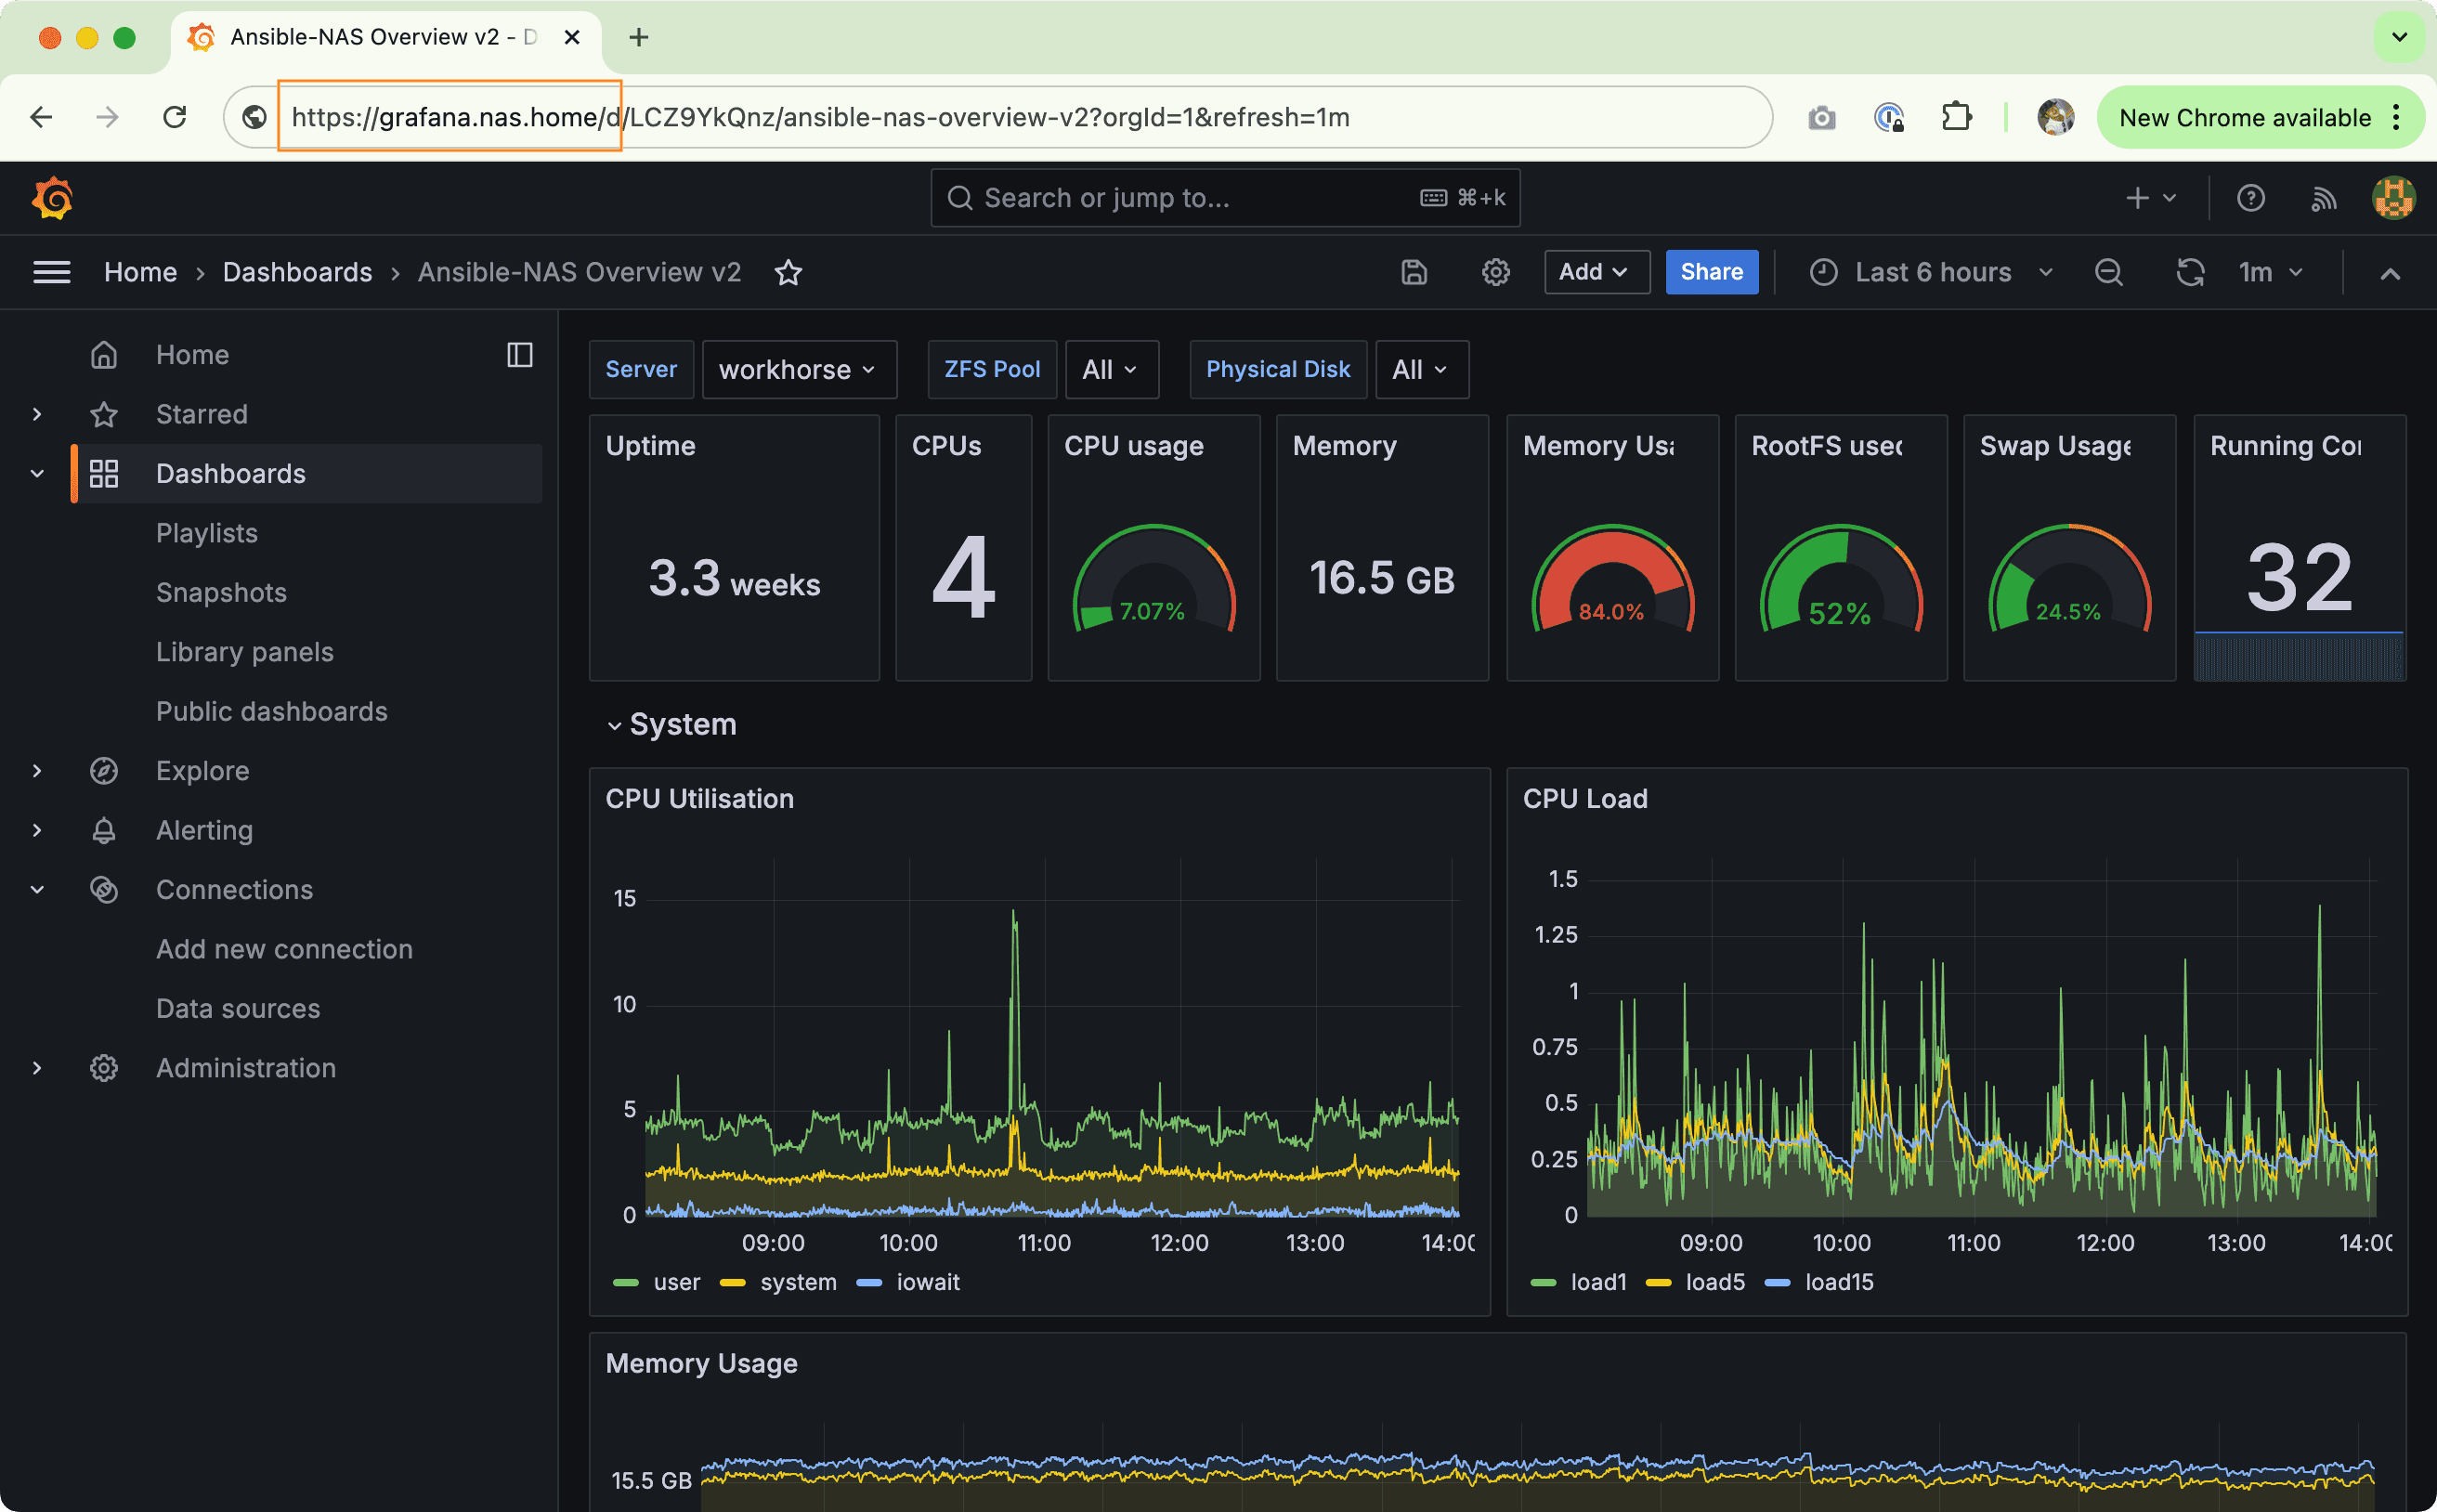
And VOILA! Now I can access my stuff using nice subdomains like read.nas.home (calibreweb), save.nas.home (wallabag), git.nas.home (gitea), grafana.nas.home, etc.
That’s it for now. In the next article I’ll cover zfs and how I use it to ensure data safety.